 ultimate-guide
Custom Car Audio Installation Cost: A Complete 2026 Guide
Table of Contents
- What Drives Custom Car Audio Installation Cost
- Breaking Down Head Unit and Amplifier Installation Pricing
- Car Audio Installation Labor Rates and What They Cover
- How Long Does Car Audio Installation Take
- Speaker, Subwoofer, and Additional Component Costs
- Professional Car Audio Installation vs DIY: Cost and Complexity
- Vehicle-Specific Factors That Increase Installation Costs
- Getting an Accurate Quote for Your Custom Audio System
- Frequently Asked Questions
Last Updated: September 25, 2026
What Drives Custom Car Audio Installation Cost
Understanding car audio installation cost requires recognizing that the total depends on far more than just the equipment price. When you're budgeting for a professional audio upgrade, you're paying for three distinct components: the hardware itself, the labor to install it correctly, and any vehicle-specific modifications needed to make everything work together seamlessly.
Most vehicle owners underestimate the labor portion. The equipment might represent 40-60% of your total investment, but the remaining cost covers expertise, tools, and the time required to integrate modern aftermarket components into your vehicle's existing electrical and structural systems. A double din head unit paired with component speakers and a subwoofer enclosure requires careful planning around your vehicle's dashboard layout, wiring harness compatibility, and sound deadening material placement.
The biggest variable isn't the quality of the components, it's your specific vehicle. A straightforward installation in a newer sedan differs dramatically from retrofitting a motorcycle or classic truck. Factory integration points, steering wheel control interfaces, and electrical system capacity all influence the final bill. Understanding these factors upfront helps you make informed decisions about what's genuinely necessary versus what represents optional upgrades.
Breaking Down Head Unit and Amplifier Installation Pricing
Single Din vs Double Din Head Units
A single din head unit occupies a compact space in your dashboard, while a double din unit takes up twice the vertical real estate. This seemingly simple difference creates significant installation complexity. Single din units slide into factory openings with minimal modification in most vehicles, but double din replacements often require custom dash kits, additional wiring harness work, and sometimes structural reinforcement.
The installation labor for a double din head unit typically involves more time than a single din because technicians need to carefully remove factory trim pieces, assess wiring compatibility, and ensure proper grounding. If your vehicle has factory steering wheel controls, integrating an aftermarket head unit demands additional interface modules and programming. This integration work, not the head unit itself, drives up labor costs considerably.
Double din systems offer superior functionality: larger touchscreens, better interface options, and more integration possibilities with modern smartphones and navigation systems. The trade-off is installation complexity. Single din units work well for straightforward audio upgrades focused purely on sound quality, while double din systems suit drivers wanting comprehensive infotainment control alongside audio performance.
Monoblock vs 4-Channel Amplifier Installation
A monoblock amplifier delivers dedicated power to a single subwoofer, producing deep bass with minimal distortion. A 4-channel amp powers front and rear speakers simultaneously, distributing power across your entire system. The installation approach differs significantly between these configurations.
Monoblock amplifier installation requires running a single power cable from your battery through the firewall, along with a remote turn-on wire and ground cable to complete the circuit. The amplifier itself mounts in your trunk or under a seat, with RCA cables running to your head unit. This relatively straightforward setup makes monoblock installation faster and typically less labor-intensive than multi-channel configurations.
Four-channel amplifier installation demands more sophisticated wiring because you're powering multiple speaker locations. Technicians must run separate speaker wires to each channel, ensure proper impedance matching, and verify that your electrical system can handle the total power draw. The added complexity of DSP tuning, adjusting time alignment and frequency response across multiple channels, extends installation time. Professional installation for a 4-channel system includes bench testing and real-world tuning to optimize sound staging and balance.
Car Audio Installation Labor Rates and What They Cover
Professional installation labor typically reflects the technician's experience level, your vehicle's complexity, and the scope of work required. Labor rates cover more than just hands-on installation time. Your cost includes system design consultation, parts compatibility assessment, electrical system evaluation, and post-installation tuning and testing.
When you pay for professional installation, you're getting expertise that prevents costly mistakes. A technician evaluates your vehicle's electrical capacity before recommending amplifier sizes, checks wiring harness compatibility before ordering components, and identifies potential grounding issues that could cause noise or system failures. This diagnostic work happens before any tools come out, and it's what separates a professional shop from someone who simply follows installation instructions.
The installation process includes sound deadening application in door panels and trunk areas, which requires removing panels and carefully applying material to reduce vibration and road noise. This labor-intensive step directly improves audio clarity and bass response, but it's time-consuming work that significantly impacts your final bill. Professional installers also run all wiring through proper conduit, secure cables away from moving parts, and test every connection before reassembling your vehicle.
How Long Does Car Audio Installation Take
Installation duration varies dramatically based on your system's complexity and your vehicle's design. A straightforward head unit swap in a modern sedan might take 2-4 hours, while a complete custom system with multiple amplifiers, subwoofers, and extensive sound deadening can stretch to 20-30 hours across multiple days.
Component speaker installation requires removing door panels, building mounting brackets, running speaker wires through firewall and door harnesses, and carefully reinstalling trim pieces without damage. This work alone typically requires 4-6 hours per vehicle, depending on panel accessibility and whether custom fabrication is needed. Subwoofer enclosure installation adds another 3-5 hours, particularly if the enclosure requires custom mounting or extensive wiring integration.
The real time investment comes from system integration and tuning. After all physical installation is complete, professional technicians spend 2-4 hours on DSP configuration, frequency response adjustment, and real-world testing. This tuning phase ensures your system sounds its best and that all components work together cohesively. Rushing through this phase results in poor sound quality and potential compatibility issues that surface later.
Speaker, Subwoofer, and Additional Component Costs
Component Speakers vs Coaxial Speakers
Component speakers separate the tweeter (high frequencies) from the woofer (mid and low frequencies), allowing each driver to operate in its optimal frequency range. Coaxial speakers mount tweeters directly on woofer cones, creating a more compact package. The installation approach differs significantly between these designs.
Component speaker installation requires building custom mounting brackets for tweeters, often positioning them on door panels or dashboard areas for better sound staging. This installation work is more complex than coaxial speaker mounting, which typically fits into existing speaker openings. The benefit of component speakers, superior sound quality and accurate imaging, justifies the additional installation labor for serious audiophiles.
Coaxial speakers offer simplicity and cost-effectiveness, making them ideal for straightforward upgrades where space is limited or budget is constrained. Installation is faster because you're essentially replacing factory speakers with minimal modification. However, the acoustic compromises of coaxial design become apparent once you've experienced quality component systems.
Subwoofer Enclosure and Installation
A subwoofer enclosure houses the subwoofer driver and shapes how bass frequencies radiate into your vehicle. Sealed enclosures produce tight, controlled bass, while ported enclosures emphasize volume and impact. The enclosure type influences installation complexity and final cost.
Sealed enclosures are typically smaller and mount more easily in trunk spaces or under seats. Installation involves securing the enclosure, running power and RCA cables from your amplifier, and ensuring proper ventilation around the enclosure. This straightforward approach suits most vehicles and installation scenarios.
Ported enclosures require more space and careful positioning to function correctly. The port design must be precisely calculated for your subwoofer and vehicle, and installation technicians need to verify that the enclosure sits in an optimal location for bass response. Custom enclosure fabrication, building a box specifically designed for your vehicle, represents a significant portion of installation costs but delivers superior performance compared to generic pre-built options.
Professional Car Audio Installation vs DIY: Cost and Complexity
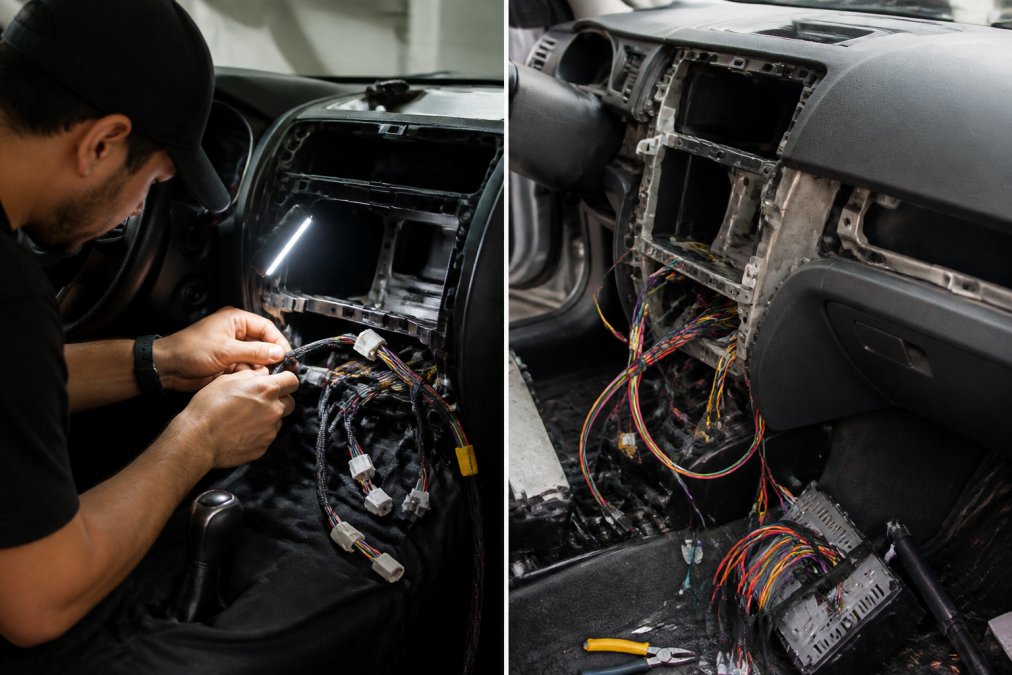
Professional installation eliminates the risk of electrical damage, improper grounding, and incompatible component integration.
Vehicle-Specific Factors That Increase Installation Costs
Factory Integration and Steering Wheel Controls
Modern vehicles integrate audio controls into steering wheel buttons and factory infotainment systems. Retrofitting an aftermarket head unit while preserving steering wheel controls requires specialized interface modules and programming expertise. This integration work adds significant labor costs because technicians must understand both your vehicle's factory system architecture and the aftermarket head unit's compatibility requirements.
Electrical System Upgrades and Grounding
Your vehicle's electrical system must support the total power draw of your audio equipment. A high-powered amplifier demands upgraded battery capacity, larger gauge power cables, and potentially a secondary battery in some installations. These upgrades prevent voltage sag, which degrades amplifier performance and audio quality.
Getting an Accurate Quote for Your Custom Audio System
A detailed quote requires comprehensive information about your vehicle, your desired audio components, and your performance goals. Professional shops evaluate your vehicle's specific characteristics, year, make, model, existing electrical system condition, and any factory features that affect integration, before providing pricing.
Frequently Asked Questions
How much does it typically cost to install a custom car audio system?
Custom car audio installation cost varies widely based on your vehicle type, components chosen, and labor complexity. A basic head unit installation may cost less, while a full system with amplifiers, subwoofers, and custom fabrication runs significantly higher. The best way to understand pricing for your specific vehicle and goals is to request a quote from a professional installer who can assess your vehicle's electrical system, space constraints, and integration needs.
What factors most influence the total cost of car audio installation?
Several key factors affect your final cost: vehicle type and year (some require more complex factory integration), components selected (head unit quality, amplifier type, speaker configuration), installation complexity (custom fabrication, wiring upgrades, grounding work), and whether you need steering wheel control interface or DSP tuning. Additional expenses arise from sound deadening materials, custom enclosures, and electrical system upgrades for vehicles with demanding power requirements.
Is professional car audio installation worth the cost compared to DIY?
Professional installation ensures proper system integration, correct wiring and grounding, warranty coverage, and optimized tuning that DIY rarely achieves. Professionals handle vehicle-specific challenges like factory integration and electrical compatibility, reducing risk of damage or poor performance. For motorcycles and specialty vehicles especially, professional expertise prevents costly mistakes and ensures your audio system functions reliably long-term.
How long does a typical car audio installation take?
Installation timeline depends on system complexity. A basic head unit swap may take 2-4 hours, while a full custom system with amplifiers, subwoofers, and sound deadening can require 8-20+ hours across multiple installation bays. Vehicle-specific factors like factory integration complexity and custom fabrication needs extend timeline. Your installer can provide an accurate estimate after assessing your vehicle and component specifications.